Overdriven Normal Output(ODNO) Lights
| Advertisement: AquariumGuys carries all your aquarium lighting essentials from aquarium bulbs to tank hoods. |
Disclaimer: The following information should be used at your own risk. Electrical equipment should only be modified by qualified technicians. GWAPA cannot take any liability for any injury or losses incurred from the use of this information.
What is ODNO Lighting?
ODNO lights are normal fluorescent lights that are rigged to burn brighter than the manufacturer-rated wattage. This allows a hobbyist to inexpensively setup a high-light tank. The setup described below produces approximately 1.75 the normal bulb output. So, a 32 watt bulb, would produce approximately 56 watts. Our light strip will allow for two of these, so we can build a 112 watt light strip for $20-$30, bulbs included.
What you need
| 2 – 2x32Watt ShopLight model HBSL-15 from Home Depot. They must have electronic ballasts. Magnetic ones do not work! This strip has the SunPark SL15 ballast in it. | 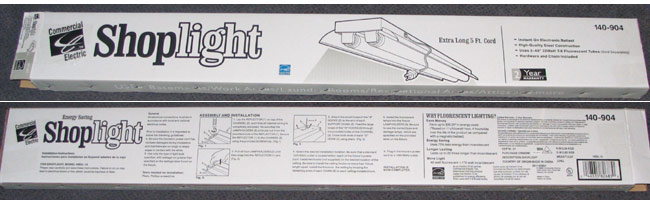 |
| 2 – T8 bulbs. | |
| 1 – Extension Cord | |
| 1 – On/Off switch | |
| 2 Wire Nuts | |
| Electrical Tape | |
| Pliers | |
| Wire stripper/cutter |
Assembly
| 1. Take the cover off of one of the shoplights. Take note of the ballastand the wires running to four endcaps. Now, you need to rewire the light so that the ballast is driving two, instead of four, endcaps. The remaining two will be removed. | 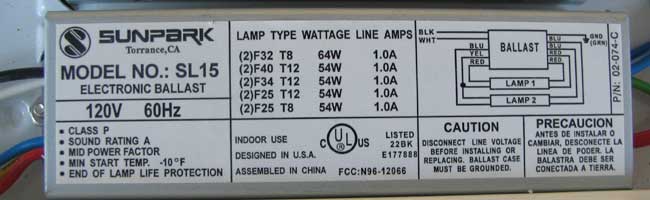 |
| 2. Locate the endcap with red and yellow wires attached. Remove the red wire from this endcap. Now remove the remaining yellow wire from both endcaps.
The technique for removing wires from the endcaps is to grab them with the pair of pliers, close to the base, and to twist the wire and pull STRAIGHT back. Trying to rotate the wire out will result in the end of the wire snapping off. |
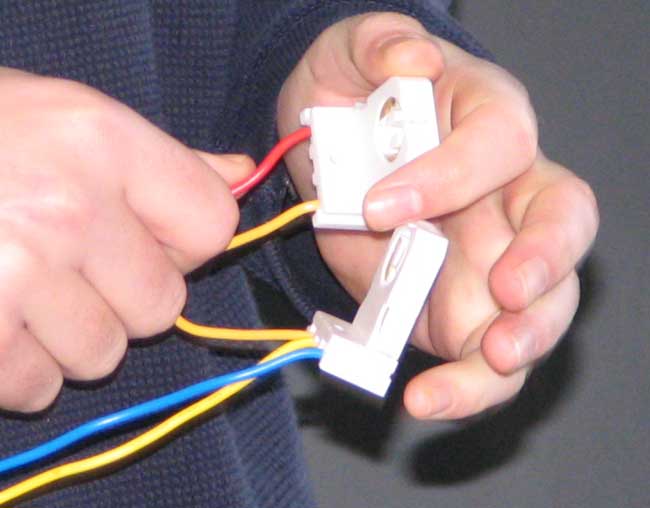 |
| 3. Plug the red wire into the endcap with blue and yellow wires. Plug it into the socket next to the blue wire, as shown. | 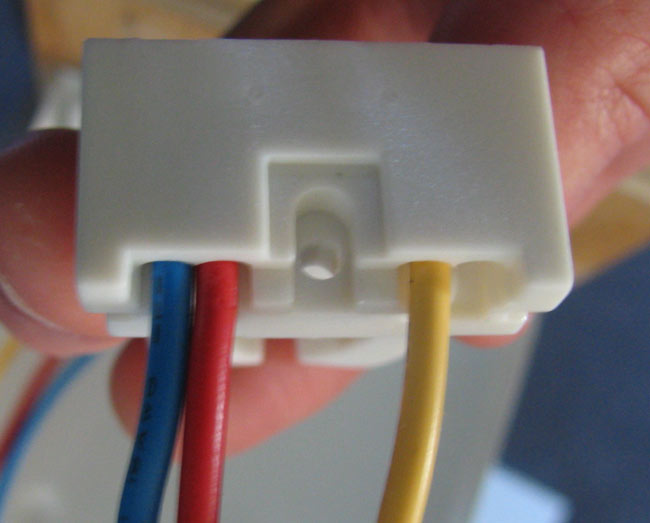 |
| 4. Now, locate the two endcaps on the other side of the lightstrip. Take the two red wires from one endcap and plug them into the endcap with two blue wires. | 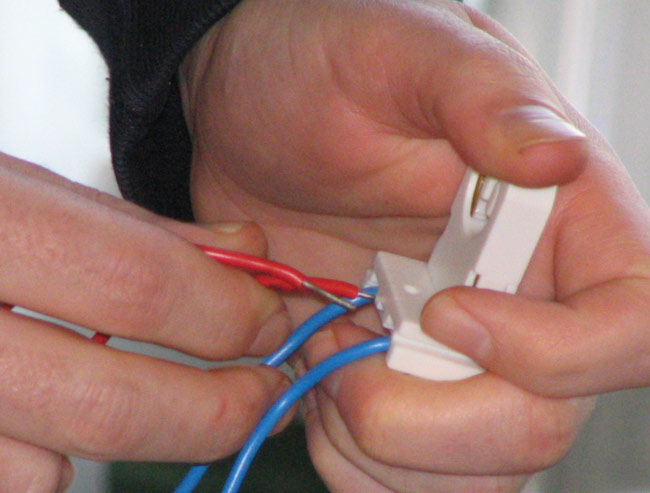 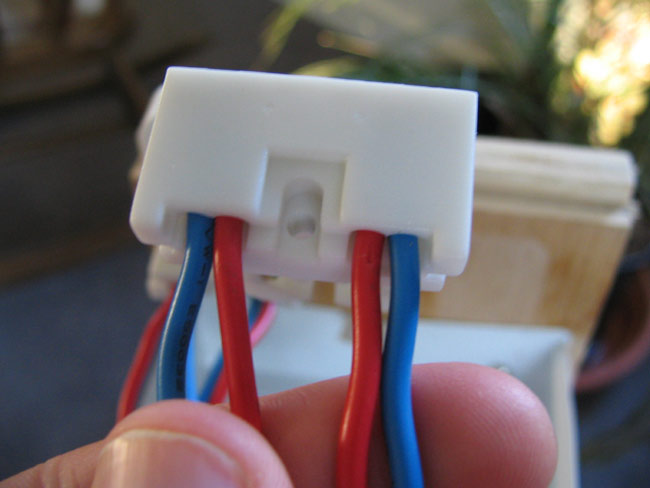 |
| 5. You’re done with the mounts and ballast for one of the bulbs. Now, simply remove the ballast from the second light strip, install it in the first strip, and repeat steps 2-4. |  |
| 6. Now, we need to connect the ballasts to the extension cord. Cut off the female end of the extension cord. Remove the existing shoplight cord, and pull the new one through the hold in the case. Now, use wire nuts and electrical tape to connect the cable to the ballasts. | 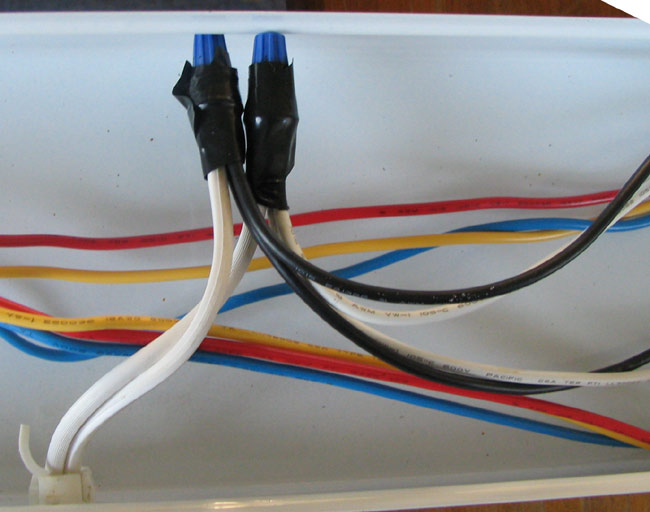 |
| 7. This step is optional. To add an on/off switch to the light,simply splice the switch into one of the extension cord’s wires. Secure with electrical tape. |  |
| 8. The light is now finished. Reassemble, and mount in your hood. If you are not mounting this is in a canapy, make sure that you raise it up so that it has air circulation around the bulbs. These bulbs get hot! We did this with some wood stilts on each end. |  |