Pressurized CO2 (May 2009 Meeting Notes)
If the mere thought of pressurized CO2 injection makes you feel like your head will explode, fear not! The May GWAPA meeting at Rob Peterson’s house was intended to be a safe environment where you could be around a supportive group of folks ready to hold your hand through the transition. It’s really not nearly as scary as you think…we promise!
 This meeting didn’t disappoint. A packed room and incredible auction items set the May meeting in the books. Our gracious hosts opened their home again this year and we were all welcome to the Hokie Haven and 15+ fishtanks, including fauna most GWAPA members don’t often see in their planted tanks. Then on to the hot topic: Pressurized CO2!
Why pressurized CO2? We could probably list a hundred reasons, but the biggest reason would have to be because having available carbon is a very important ingredient for photosynthesis. Whether you have high light or low light conditions your aquatic plants can benefit from adding CO2.
Methods
There are several methods of adding CO2 to your aquarium. These are the most popular:
DIY makes CO2 from mixing yeast and sugar, and harnessing the resulting CO2 from the reaction. This is a good way of getting into CO2 without the steep initial cost of equipment, but is not recommended for anything larger than a 30-gallon tank. This method is a tad labor-intensive as well, since there is a significant amount of monitoring the mixture and maintenance involved. It is also not a very stable or consistent delivery of CO2 and the cost over time will be less attractive.
Liquid carbon additives are a fuss-free way to add bio-available carbon to your aquarium via products like Seachem’s Excel. These products are quite effective, but also will be quite expensive for long-term use or any large tank.
Mineralized soil mixtures will produce CO2 through the organic decomposition process. This is a great way to have a completely natural tank environment.
Pressurized systems are the pinnacle of CO2 delivery. While the start-up costs can seem prohibitive, in the long run the maintenance cost is minimal, and generally the equipment will last for years with no issues. This is also the best way to be able to have a constant, stable, clean, and completely adjustable supply of CO2 to your aquarium.
Equipment
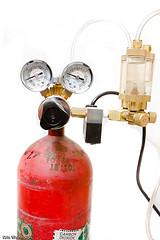
For a pressurized CO2 system you need only a few pieces to complete a setup. The task may seem daunting, but once you dive in you will be pleasantly surprised at how simple it really is. The biggest and most important part is your regulator. This piece attaches to the CO2 tank directly and lowers the tanks pressure down to a pressure that can be fine-tuned. There are several sources for these, and most any will do what you need. The most popular brands are Milwaukee, JBJ, Azoo, and Dupla, but you can find other brands at beverage supply stores and the like. The best advice for this purchase is to actually call the source you are ordering from and explain what you will be using the regulator for. Also to save headache, purchase the whole setup already configured (Milwaukee offers a good product) with your needle valve and solenoid if you choose to use one.
Along with your regulator, you will need a needle valve. This piece attaches “downstream” from the regulator. The purpose of your needle valve is to be able to fine-tune the delivery of the gas from the high-pressure output of the regulator to something more manageable in a “bubbles per second” form. This piece is what does a lot of the hard work, and investing in a higher quality piece can not only last (potentially) for as long as you have it but will also be reliable and not need adjusting once set.
With your needle valve you can choose to run a bubble counter. This is simply a clear tube that the output from the needle valve flows through to visually show you how much gas is flowing to your aquarium. You can fill the tube with any thick, clear liquid such as glycerin (found at most grocery stores) which will allow the bubbles passing through to be seen…and counted. This is where you will be able to actually measure your bubbles per second. While this is not a terribly precise or scientific method of measurement, it is a widely accepted means to get a decent idea of how much CO2 you are injecting.
From your needle valve/bubble counter you will run CO2 tubing (standard airline tubing is not suitable because CO2 can diffuse thru the silicon walls of the tubing) to your preferred diffusion method. One popular way to diffuse CO2 in your aquarium is through a glass diffuser. These pieces attach via small suction cups to the side of your aquarium and force the CO2 gas through ceramic disks to diffuse the large bubbles into superfine bubbles. The amount of diffusion directly correlates to how effective your CO2 system will be. The greater the diffusion, the better the distribution throughout the water column, thereby making the CO2 widespread and more readily available to your plants. Another method of in-tank diffusion is through an in-tank reactor. It works by attaching the piece to your filter or a powerhead where water is forced through the gas coming in and can garner near 100% diffusion rates. If you just can’t stand the look of more equipment in your tank, you can make a DIY external reactor that will work in-line from your canister filter to break up your CO2 by forcing it over layers of bio balls en-route to dispersion through your filter outlet into your aquarium. Or you can plumb your CO2 line directly into your canister filter, but make sure your filter can support this additional pressure or the result can airlock your filter. Many hobbyists have reported good success with Eheim and Rena canister filters using this method. For other filters, research online prior to bubbling CO2 directly in your filter.
Adjusting Your Rate
Start at 1 bubble per second (bps). Over the next few hours watch your fauna to make sure there are no signs of distress. Remember, adding CO2 is changing the ratio of available oxygen to other gasses in the water. The CO2 is also lowering your pH level which can also be very stressful to your fish if the change is drastic and occurs over a short period of time. While it is not generally a problem under normal circumstances it is possible to inject enough CO2 to cause harm to your aquarium inhabitants. If you would like a more detailed chart on how to adjust your rate, see this chart for some guidance.
KH vs pH
Chemistry class was fun, right? In an aquatic environment, adding CO2 results in lower pH levels. This occurs from the transition of carbonates to carbonic acids. To add more science, a higher KH level will act as a buffer to the conversion of carbonic acid. A good rule of thumb is to aim for lowering your overall tank pH by one degree with your CO2 injection.
Optional Equipment
As with anything else, automation not only makes for an easier life but a better balance in your aquarium. A solenoid valve on your regulator will allow you to be able to turn your CO2 injection on and off with your lights (or whenever you choose). Since plants will not uptake CO2 from the water column when the lights are off, continuing to inject CO2 at night is wasteful and can cause undesirable pH fluctuations. A solenoid is a very good option to make use of.
If you have more than one tank you would like to inject CO2 into you can get a manifold splitter which will allow you to split the output from your regulator into separate needle valves to be able to inject (and individually adjust) several tanks at a time.
A pH controller is a piece of equipment that you can set to a specific target pH level and will monitor the status of the water in your aquarium via a probe and regulate the addition of CO2 accordingly to achieve the target pH level. While extremely tech-cool, this system tends to be a bit fussy and can get expensive as the probes need to be replaced regularly and if not properly grounded the readings can vary.
Some Pitfalls and Sage Advice
One of the most likely things you will encounter with a pressurized CO2 system is leaks. Check all of your connections regularly with a soapy water solution swiped across areas of likeliness (but make sure to avoid the solenoid as it houses sensitive electronics). If you have any leaks they will be easy to see, as they will bubble up the soapy solution.
If you are injecting the CO2 into your canister filter you can airlock the filter if it is not able to handle the extra pressure inside the canister.
“End of tank dump” can be a terrible thing to experience. When the amount of liquid CO2 in your tank is depleted the last bit of liquid CO2 vaporizes and blasts the remaining pressure through. The unstable conditions can cause the remaining contents of the tank to flow all at once through the regulator (that is set to regulate pressures over 800 psi–what would normally be in your CO2 tank) thereby “dumping” a large amount of CO2 into your aquarium. While this could be a potentially devastating occurrence to any fish living in your aquarium it can be avoided by making sure to use a high/low pressure regulator or a pressure release valve and refilling your tank before it gets to be completely empty.
In case of emergency (because you just know your tank will run out on Friday night before a holiday weekend that you have company coming into town), keep a spare tank so you can swap out a nearly empty one without necessitating an emergency trip to any refill shop that you could bribe into being open late enough for you to get to.
If you rent a CO2 tank instead of purchasing make sure the inspection date is good on the tank you receive. If it is not you could be responsible for the hydrostatic test when you bring it back to refill. Conversely, if you buy a used tank make sure the test is recent, or you will not be able to refill once the date is passed without getting retested.
Safety first! Make sure to handle your CO2 tank carefully. It is no exaggeration that if the neck breaks it will become a missile and can shoot through a concrete wall. Do not drop your tank, and make sure that it is securely fastened and upright when stored or in use.
Pictures from the May Meeting
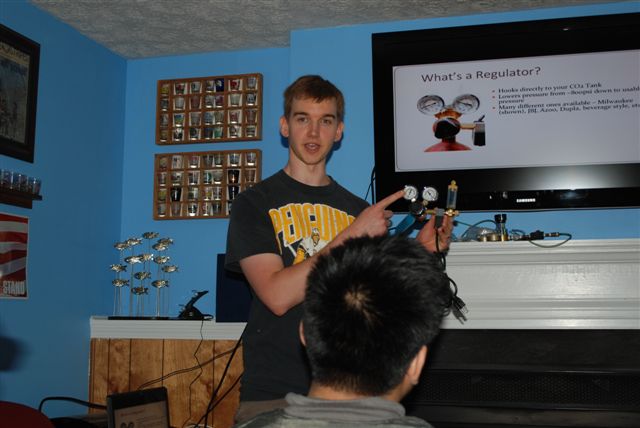
Kris, Showing Off a Regulator
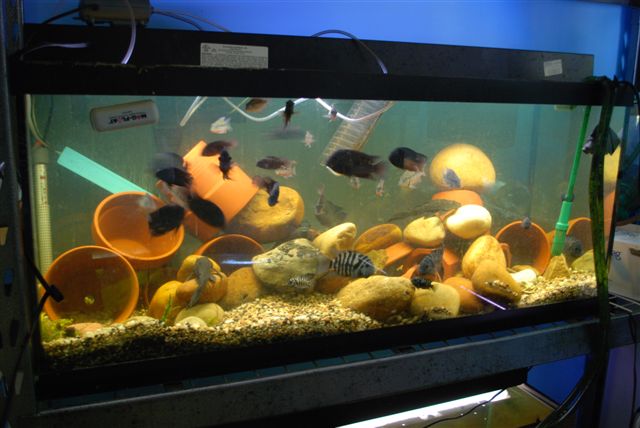
Rob's Tank
Rob's Tank

Rob's Tank

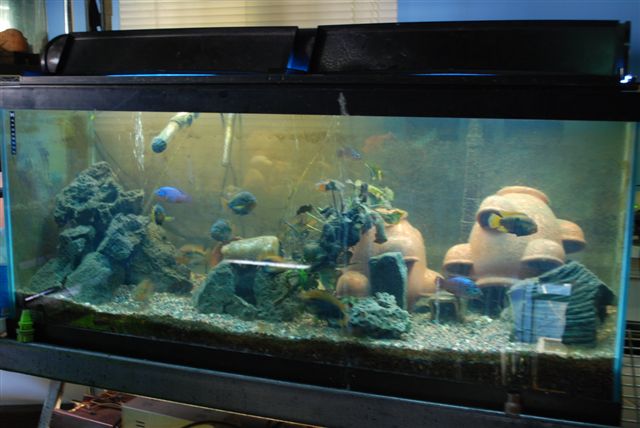
Rob's 75G Tank, Rescaped